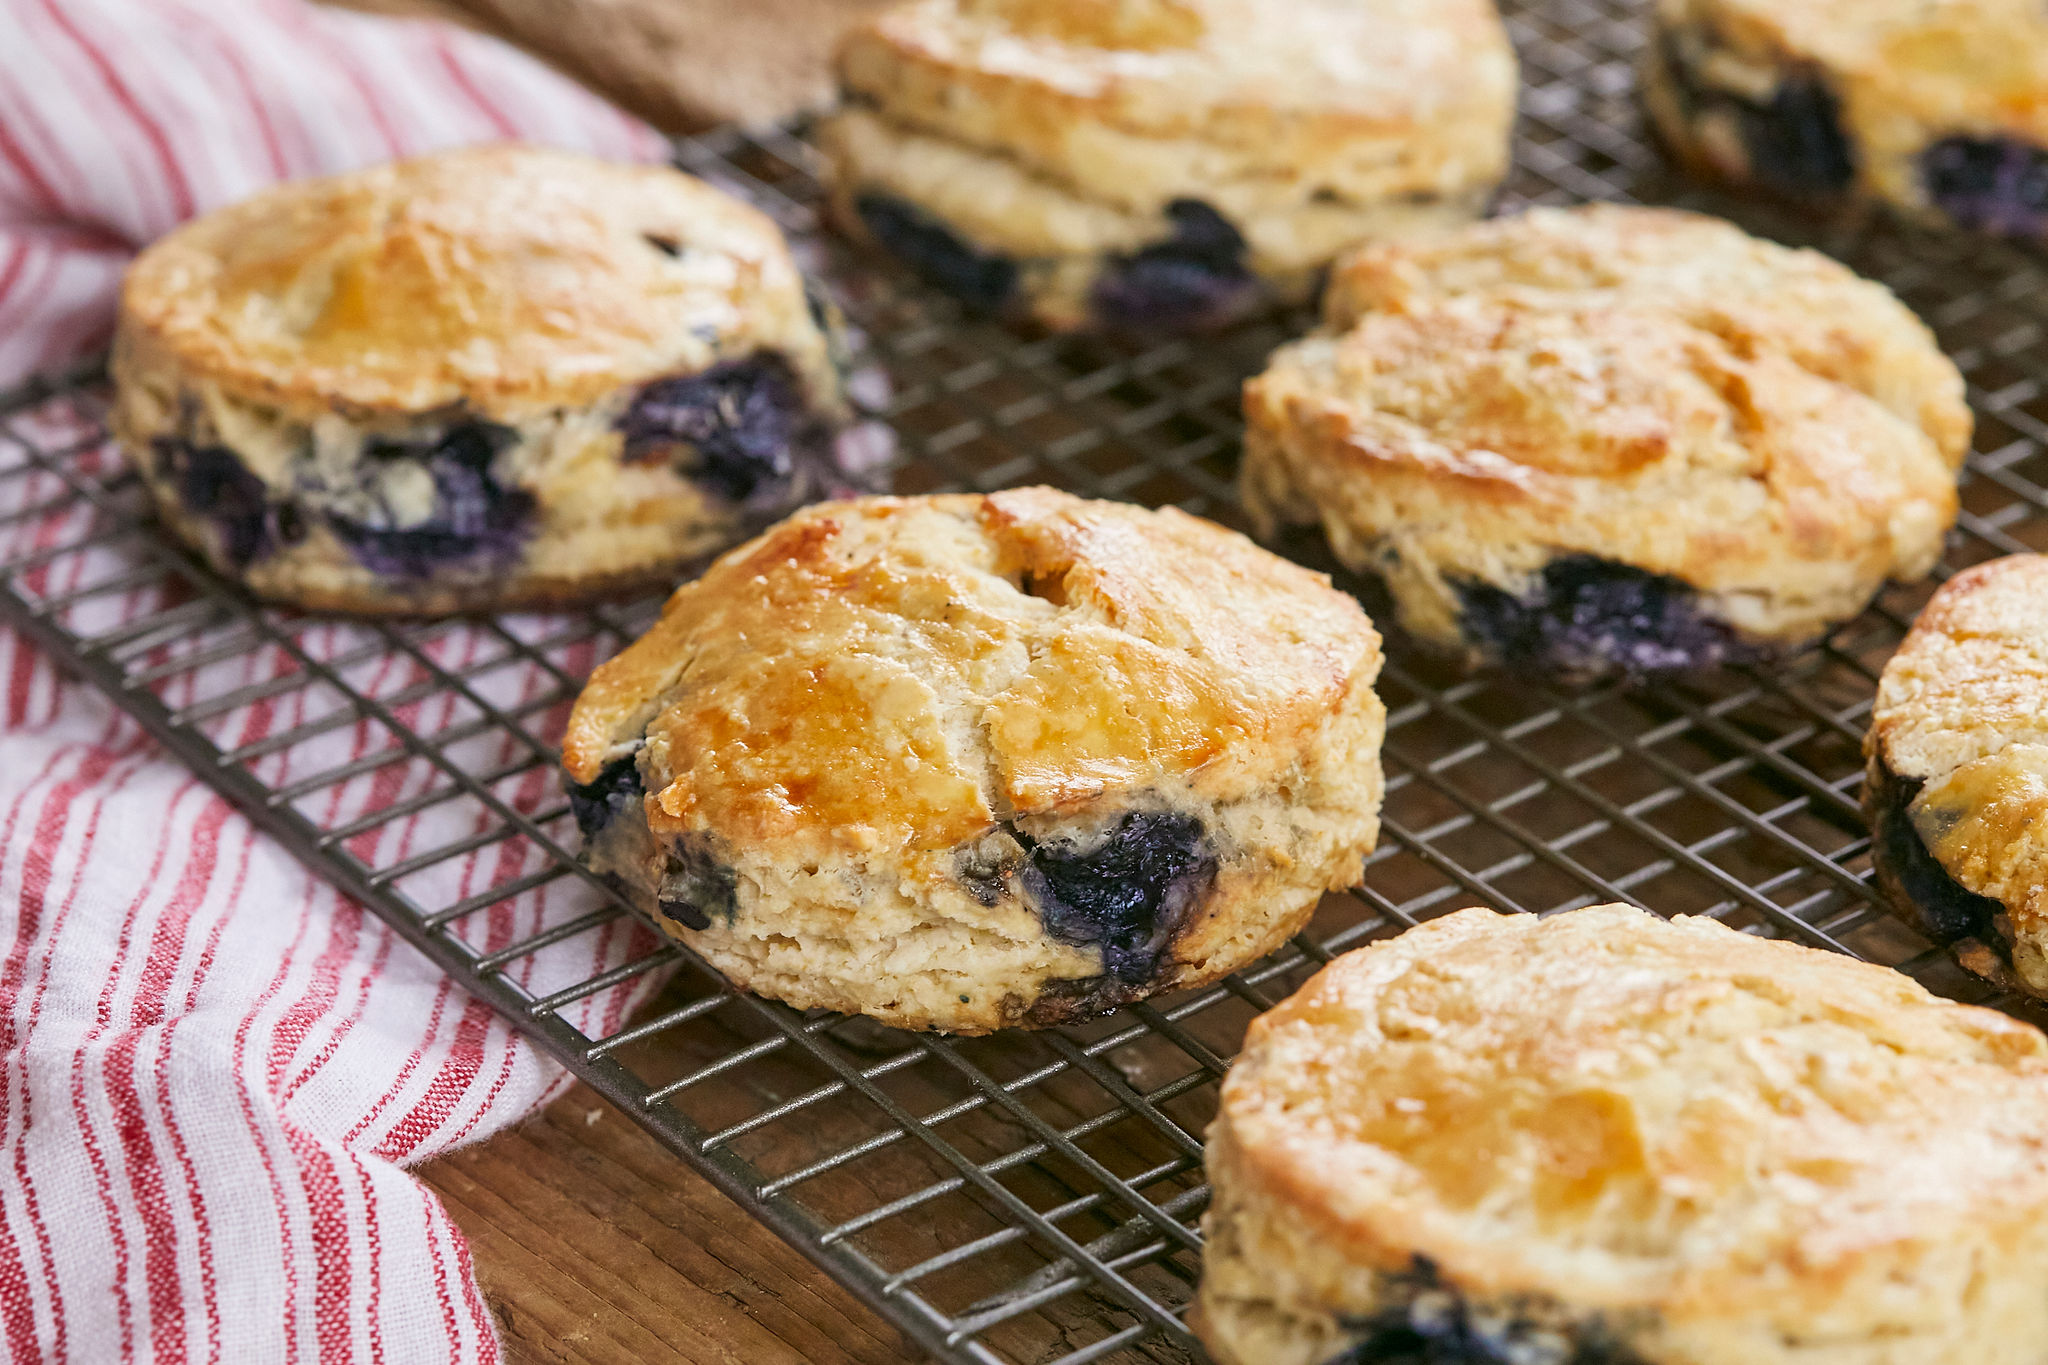
Imagine biting into a warm, golden-brown scone fresh out of the oven, bursting with juicy blueberries and topped with a dusting of powdered sugar. Sound dreamy? Well, it doesn’t have to be just a dream. Today, we’re diving deep into the delicious secrets behind Sally’s blueberry scones, and trust me, by the end of this article, you’ll be baking like a pro!
There’s something magical about homemade scones. They’re that perfect balance of flaky, buttery, and slightly sweet—kind of like your favorite jeans, they just fit. But not everyone knows the tricks to make them as good as Sally does. Her blueberry scones are legendary, and we’re about to spill all the tea—or should I say, all the butter.
Now, before we get into the nitty-gritty, let’s address the elephant in the room: why blueberry scones? Well, blueberries are like nature’s candy. They add a burst of flavor without overpowering the rest of the ingredients. Plus, they pair beautifully with the richness of butter and cream. So, if you’re ready to level up your baking game, grab your apron and let’s get started!
Read also:Wandering Toddler Unveils Home Mystery The Unbelievable Truth Behind The Little Explorer
Why Sally’s Blueberry Scones Are So Special
Sally’s blueberry scones have a reputation for being some of the best around, and it’s not just because she’s got a magic touch. There’s science behind those fluffy, buttery bites. Let’s break it down:
First off, Sally uses high-quality ingredients. We’re talking fresh blueberries, real butter, and top-notch flour. But it’s not just about what she puts in—it’s about how she does it. Her technique is spot-on, and that’s what sets her apart. She knows exactly when to stop mixing, how long to chill the dough, and the perfect temperature for baking.
Oh, and did I mention the secret ingredient? Nope, it’s not unicorn tears or fairy dust (though that would be cool). It’s something much simpler: patience. Sally takes her time with each step, and it shows in the final product. Her scones aren’t just good—they’re life-changing.
Meet Sally: The Queen of Scones
Before we dive deeper into the baking process, let’s take a moment to meet the mastermind behind these incredible scones. Sally isn’t just any baker—she’s a baking legend. With years of experience under her belt, she’s perfected the art of making scones that are both delicious and visually stunning.
Here’s a quick rundown of Sally’s baking journey:
- Started baking at age 8: Sally’s love for baking began in her childhood kitchen, where she learned the basics from her grandma.
- Opened her own bakery: At 25, Sally took the leap and opened her own bakery, which quickly became a local favorite.
- Blueberry scones are her signature: Out of all the treats she makes, blueberry scones are the ones that keep customers coming back for more.
Now, let’s take a closer look at Sally’s baking philosophy. She believes in keeping things simple but doing them exceptionally well. Her motto? “Good ingredients + great technique = unforgettable scones.” And who are we to argue with that?
Read also:Exploring The Thrilling World Of Web Series Ullu Movies
Key Ingredients for Perfect Blueberry Scones
Let’s talk about the stars of the show: the ingredients. If you want to bake like Sally, you need to start with the right stuff. Here’s what you’ll need:
- All-purpose flour: The backbone of any good scone. Sally swears by unbleached flour for its superior texture.
- Baking powder: This is what gives your scones their lift. Don’t skimp on this one!
- Salt: A pinch of salt enhances the flavors of the other ingredients. Trust me, it makes a difference.
- Unsalted butter: Cold, cold butter is key. Sally freezes hers before cutting it into the flour.
- Heavy cream: This adds richness and moisture to your scones. Don’t substitute it with anything else!
- Fresh blueberries: The juicier, the better. Sally likes to toss them in a bit of flour to prevent them from sinking to the bottom.
See? It’s not rocket science. But using the right ingredients is crucial if you want to replicate Sally’s success. Now, let’s move on to the fun part: the technique.
Step-by-Step Guide to Baking Sally’s Blueberry Scones
Alright, here’s where the magic happens. Follow these steps carefully, and you’ll be well on your way to baking like Sally:
Step 1: Prep Your Workspace
Start by gathering all your ingredients and preheating your oven to 400°F (200°C). Line a baking sheet with parchment paper. This is your canvas, and you’re about to create a masterpiece.
Step 2: Mix the Dry Ingredients
In a large bowl, whisk together the flour, baking powder, and salt. This creates a nice, even base for your scones.
Step 3: Cut in the Butter
Now, here’s where things get interesting. Take your cold butter and cut it into small cubes. Use a pastry cutter or your fingers to work the butter into the flour mixture until it resembles coarse crumbs. This step is crucial for achieving that flaky texture.
Step 4: Add the Cream
Stir in the heavy cream until the dough just comes together. Don’t overmix—it’s okay if it’s a little lumpy. Remember, less is more when it comes to scone dough.
Step 5: Fold in the Blueberries
Gently fold in the blueberries, being careful not to crush them. If they’re particularly juicy, toss them in a bit of flour first to prevent them from bleeding into the dough.
Step 6: Shape and Bake
Turn the dough out onto a lightly floured surface and pat it into a circle about 3/4 inch thick. Cut it into wedges and transfer them to your prepared baking sheet. Brush the tops with a little extra cream for a golden finish, then pop them in the oven for 15-20 minutes, or until they’re golden brown.
Tips and Tricks for Baking Like Sally
Now that you know the basics, let’s talk about some advanced tips to take your scones to the next level:
- Chill the dough: If you have time, chill the shaped scones in the fridge for 15-20 minutes before baking. This helps them hold their shape better.
- Use a light hand: Overmixing is the enemy of flaky scones. Mix just until the dough comes together, then stop.
- Experiment with flavors: While blueberries are Sally’s go-to, don’t be afraid to try other fruits or add-ins like lemon zest or chopped nuts.
These tips might seem small, but they can make a big difference in the final product. Trust me, once you try them, you’ll never go back to your old methods.
Common Mistakes to Avoid
Even the best bakers make mistakes sometimes. Here are a few common pitfalls to watch out for:
- Using warm butter: Cold butter is essential for flaky layers. If your butter is too soft, your scones will be dense.
- Overmixing the dough: As I mentioned earlier, overmixing leads to tough scones. Mix just until the dough comes together, then stop.
- Not chilling the dough: If you skip this step, your scones might spread too much in the oven and lose their shape.
Avoid these mistakes, and you’ll be well on your way to baking like Sally. It’s all about attention to detail and a little bit of patience.
Expert Insights: The Science Behind Great Scones
Ever wondered why Sally’s scones are so good? It’s not just because she’s talented—it’s because she understands the science behind baking. Let’s break it down:
First, there’s the role of gluten. Gluten gives structure to baked goods, but too much of it can make them tough. That’s why Sally uses a light hand when mixing her dough—she wants to minimize gluten development while still achieving a nice structure.
Then there’s the fat. Butter is crucial for flavor and texture. When it melts in the oven, it creates steam, which helps the scones rise. The cold butter also ensures that the layers stay distinct, giving the scones their signature flakiness.
Finally, there’s the leavening agent. Baking powder reacts with the moisture in the dough to produce carbon dioxide gas, which helps the scones rise. Sally uses just the right amount to ensure her scones are light and airy without being overly puffy.
How to Store Your Scones
So, you’ve baked your scones, and they’re absolutely delicious. But what do you do with the leftovers? Here’s how to store them properly:
- Room temperature: Scones will stay fresh for a day or two at room temperature if stored in an airtight container.
- Refrigerator: If you want them to last longer, store them in the fridge. They’ll keep for up to 5 days.
- Freezer: For long-term storage, freeze the scones in an airtight container. They’ll keep for up to 3 months. To reheat, just pop them in the oven for a few minutes.
Pro tip: If you’re reheating frozen scones, wrap them in foil to prevent them from drying out. It’s like giving them a spa day!
Delicious Variations to Try
Once you’ve mastered Sally’s blueberry scones, why not try some variations? Here are a few ideas to get you started:
- Lemon blueberry scones: Add a tablespoon of lemon zest to the dough for a fresh, citrusy twist.
- Cranberry orange scones: Swap the blueberries for dried cranberries and add a teaspoon of orange zest.
- Chocolate chip scones: Fold in some semi-sweet chocolate chips for a decadent treat.
The possibilities are endless! Don’t be afraid to experiment and make the recipe your own. After all, baking is all about creativity.
The Importance of Practice
Let’s face it: baking is a skill, and like any skill, it takes practice to get good at it. Sally didn’t become the queen of scones overnight—it took years of trial and error. But the good news is, every time you bake, you’re getting better. So don’t get discouraged if your first batch doesn’t turn out perfectly. Keep trying, and soon you’ll be baking like a pro.
Conclusion: Ready to Bake Like Sally?
There you have it—the delicious secrets behind Sally’s blueberry scones. With the right ingredients, technique, and a little bit of patience, you can bake scones that rival hers. Remember, baking is all about practice, so don’t be afraid to experiment and make the recipe your own.
Now, here’s the fun part: I want you to try this recipe and let me know how it goes. Leave a comment below with your thoughts, or share this article with a friend who loves to bake. And if you’re hungry for more baking tips, check out some of our other articles. Happy baking, and remember—Sally’s got your back!
Table of Contents
Why Sally’s Blueberry Scones Are So Special
Key Ingredients for Perfect Blueberry Scones
Step-by-Step Guide to Baking Sally’s Blueberry Scones