So, you're here because you want to know how to use SSH remote IoT on Mac for free right? Well, buckle up, my friend, because we're about to dive deep into this topic. Whether you're a tech enthusiast, a student, or just someone curious about how SSH can help you connect devices remotely, this guide is for you. We’ll break it down step by step, so even if you're not a pro, you'll walk away with actionable knowledge.
SSH (Secure Shell) is like a secret passageway that lets you control one computer from another over the internet. And when we talk about IoT (Internet of Things), we're talking about connecting devices like smart thermostats, cameras, or even your fridge. Imagine being able to control all these gadgets from your Mac without spending a dime. Sounds cool, doesn’t it?
This guide isn’t just about theory; it’s about practical solutions. By the end of this article, you'll know exactly how to set up SSH for remote IoT access on your Mac, completely free of charge. Let’s get started!
Read also:Severe Weather Alert In Metro Detroit Stay Safe Stay Informed
Table of Contents
- Introduction to SSH and IoT
- What is SSH?
- Why Use SSH for Remote IoT?
- Setting Up SSH on Your Mac
- Connecting IoT Devices via SSH
- Security Tips for SSH
- Tools You’ll Need
- Troubleshooting Common Issues
- Best Practices for Using SSH
- Conclusion
Introduction to SSH and IoT
Let’s kick things off by breaking down the basics. SSH, or Secure Shell, is a protocol that allows secure communication between two computers. It’s like a secure tunnel that encrypts all your data so no one can snoop on what you’re doing. IoT, on the other hand, refers to the network of physical devices embedded with sensors and software that allow them to exchange data. Together, SSH and IoT create a powerful combo for remote device management.
Why SSH Matters for IoT?
When you're dealing with IoT devices, security is a big deal. These gadgets often lack robust security measures, making them vulnerable to hackers. SSH adds an extra layer of protection, ensuring your data stays safe while you control your devices from afar.
What is SSH?
SSH stands for Secure Shell, and it’s basically a way to communicate securely between two computers. It encrypts all the data exchanged between the client (your Mac) and the server (your IoT device). Think of it like having a private conversation in a crowded room—no one else can hear what you're saying.
Here’s why SSH is awesome:
- It’s secure and encrypted.
- It works over the internet, so you can access devices from anywhere.
- It’s free to use, which is always a plus.
Why Use SSH for Remote IoT?
Using SSH for remote IoT access is a no-brainer if you value security and convenience. Here are a few reasons why:
Security First
IoT devices are often targeted by hackers because they’re easy to exploit. SSH encrypts all communication, making it much harder for bad actors to intercept your data.
Read also:Extrump Lawyer Backs Press Freedom A Bold Stand For Democracy
Cost-Effective
Setting up SSH doesn’t require any fancy software or hardware. You can do it all with tools that are already on your Mac, saving you money in the process.
Flexibility
With SSH, you can control your IoT devices from anywhere in the world as long as you have an internet connection. No need to be physically present to manage your smart home or office.
Setting Up SSH on Your Mac
Alright, let’s get down to business. Setting up SSH on your Mac is surprisingly easy. Follow these steps, and you’ll be up and running in no time.
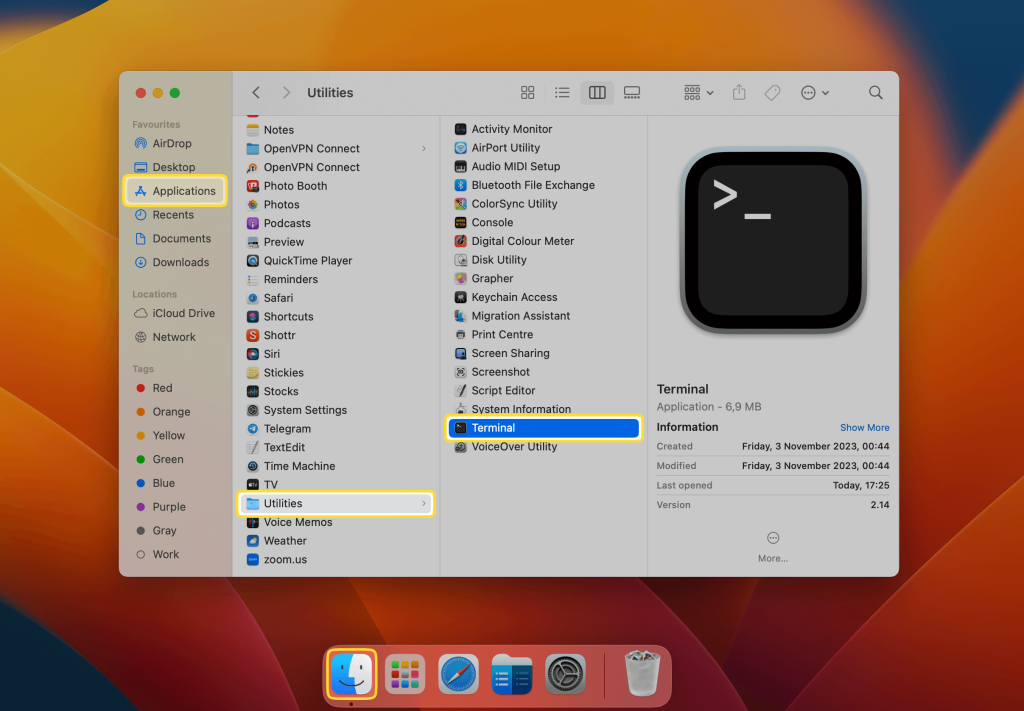
Step 1: Enable Remote Login
First things first, you need to enable Remote Login on your Mac. Here’s how:
- Go to System Preferences.
- Click on Sharing.
- Select Remote Login from the list on the left.
- Make sure the checkbox is ticked.
Step 2: Find Your IP Address
Next, you’ll need to find your Mac’s IP address. This is the address your IoT device will use to connect to your Mac. Here’s how to find it:
- Click on the Apple icon in the top-left corner.
- Select System Preferences > Network.
- Select your active network connection and look for the IP address.
Connecting IoT Devices via SSH
Now that your Mac is ready, it’s time to connect your IoT devices. Here’s how to do it:
Step 1: Install an SSH Client
Most IoT devices come with an SSH client pre-installed. If not, you can download one from the manufacturer’s website or use a third-party app.
Step 2: Enter the IP Address
Once the client is installed, enter your Mac’s IP address into the connection field. You’ll also need to enter your username and password. If you’re using a default username like “pi” (common for Raspberry Pi devices), make sure to change it for security reasons.
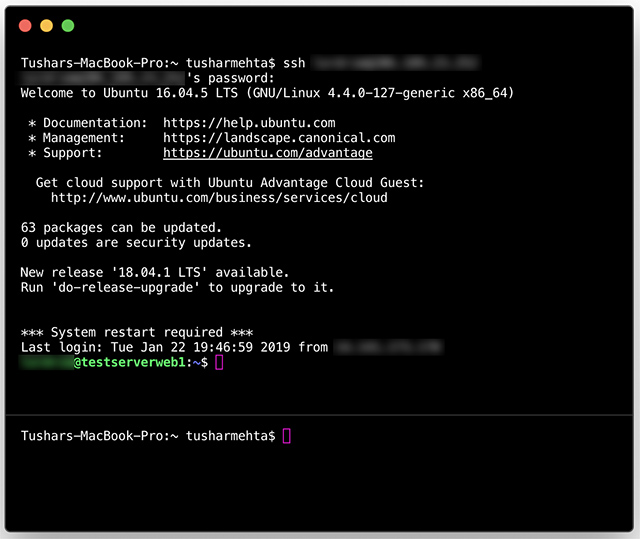
Step 3: Test the Connection
After entering the details, try to connect. If everything is set up correctly, you should see a terminal window pop up, and you’ll be ready to start managing your IoT device.
Security Tips for SSH
Security is key when using SSH for remote IoT access. Here are a few tips to keep your setup safe:
- Use strong, unique passwords for your devices.
- Change default usernames and passwords immediately.
- Enable two-factor authentication if your SSH client supports it.
- Regularly update your devices to patch any security vulnerabilities.
Tools You’ll Need
To set up SSH for remote IoT access on your Mac, you’ll need a few tools:
- A Mac computer with macOS installed.
- An IoT device with SSH capabilities.
- An active internet connection.
- An SSH client (usually pre-installed on IoT devices).
Troubleshooting Common Issues
Even with the best setup, things can go wrong. Here are some common issues and how to fix them:
Issue: Can’t Connect to Device
Solution: Double-check your IP address and make sure Remote Login is enabled on your Mac. Also, ensure your IoT device is connected to the same network.
Issue: Connection Drops Frequently
Solution: Check your internet connection and make sure your router is stable. You might also want to try using a wired connection instead of Wi-Fi.
Best Practices for Using SSH
To get the most out of SSH for remote IoT access, follow these best practices:
- Regularly back up your devices to prevent data loss.
- Limit access to trusted devices only.
- Monitor your connections for any suspicious activity.
- Stay informed about the latest security updates and apply them promptly.
Conclusion
And there you have it—a comprehensive guide on how to use SSH remote IoT on Mac for free. By following the steps outlined in this article, you can securely manage your IoT devices from anywhere in the world without breaking the bank.
Remember, security is paramount when dealing with IoT devices. Always use strong passwords, enable two-factor authentication, and keep your devices updated. If you have any questions or run into issues, feel free to leave a comment below. And don’t forget to share this article with your friends who might find it useful!
Happy hacking, and stay safe out there!